Removing tiles can be a challenging task, but with the right tools and techniques, you can do it efficiently. Whether you’re renovating a bathroom, kitchen, or another tiled area, this step-by-step guide will help you remove tiles safely and effectively.
Tools and Materials Needed
- Safety goggles, heavy-duty gloves, dust mask
- Hammer, chisel or putty knife, pry bar
- Utility knife, scraper, power tools (optional)
- Heat gun (for stubborn adhesive)
- Trash bags or a bin for debris
Preparation
- Safety First: Wear safety gear to protect yourself from debris and sharp edges.
- Clear the Area: Remove all furniture, appliances, and other items. Cover any fixtures or surfaces that need protection.
- Turn Off Utilities: For kitchens or bathrooms, ensure water and electricity are off to prevent accidents.
Step-by-Step Tile Removal
- Start with a Corner Tile
- Begin at the edge or a loose tile. Use a utility knife to cut along the grout lines around the tile.
- Place a chisel or putty knife under the tile edge and gently tap it with a hammer to loosen it. Pry it up carefully.
- Remove Remaining Tiles
- Continue with adjacent tiles. Insert the chisel or putty knife under the next tile and use the hammer to loosen and lift it.
- Work systematically, moving from tile to tile. Use a pry bar for additional leverage if needed.
- Remove Adhesive and Grout
- After all tiles are removed, clean the surface of any remaining adhesive or grout. Use a scraper or chisel for removal.
- Use a heat gun to soften stubborn adhesive if necessary.
- Dispose of Debris
- Place all removed tiles and debris in trash bags or a bin. Follow local regulations for construction waste disposal.
Special Considerations
- Removing Tiles from Drywall
- Be careful to avoid damaging the drywall. Use a putty knife to gently separate tiles from the surface.
- Patch or replace damaged sections of drywall as needed.
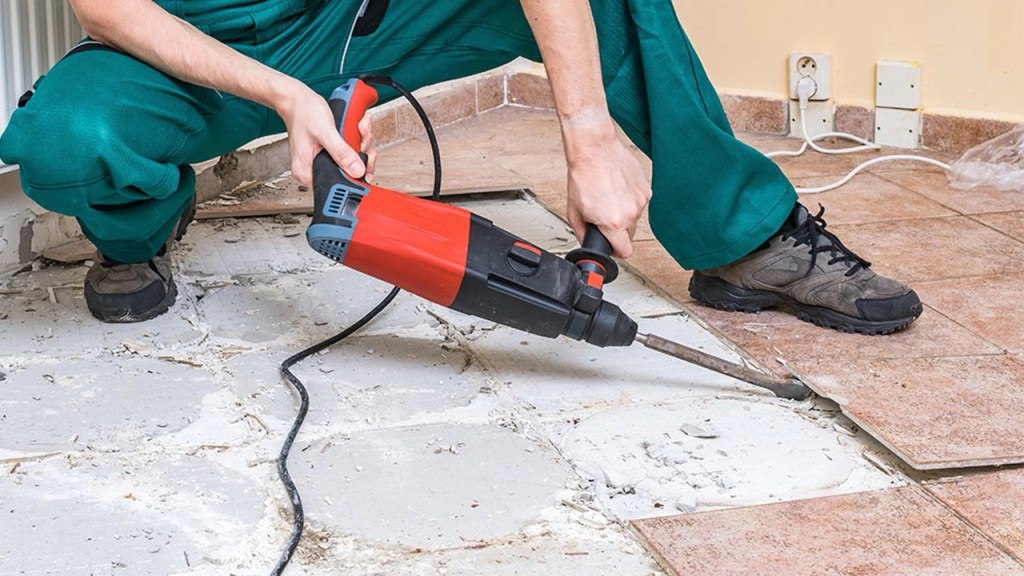
- Removing Floor Tiles
- Floor tiles may require a heavier-duty chisel and hammer. Consider using a power tool like an oscillating multi-tool with a grout removal blade.
- Dealing with Difficult Tiles
- For tough tiles, use a grout saw or rotary tool to cut through the grout and free the tile.
Advanced Techniques
- Using Power Tools
- Power tools like an angle grinder with a diamond blade can speed up the tile removal process. Always follow safety protocols when using power tools.
- Heat Gun for Stubborn Adhesive
- A heat gun can soften adhesive, making it easier to scrape off. Heat the adhesive evenly and avoid burning the underlying surface.
- Surface Repair
- After tile removal, inspect the surface for damage. Repair any cracks or holes with appropriate materials like joint compound for drywall or a leveling compound for floors.
After Tile Removal
- Inspect the Surface
- Check the underlying surface for damage or uneven areas that need repair before installing new tiles. Ensure the surface is clean, smooth, and dry.
- Prepare for New Tiles
- Once the surface is prepared, proceed with installing new tiles. Follow manufacturer instructions for the adhesive and grout you plan to use.
Summary
Removing tiles is a manageable task with the right tools and precautions. By following these steps, builders and shopfitters can remove old tiles efficiently and prepare surfaces for new installations. Always prioritize safety and take your time to ensure the job is done correctly.
For more detailed guides on tile removal and installation, visit professional resources or consult with us.
The next step after removing your old tiles is finding the right new ones. We have a wide range of durable and asthethic tiles. We specialise in porcelain tiles, but there are also other tile options to choose from as we’ve covered here.
For wet areas, slip rating is important and we’ve convered it in detail here. Do check it out!
